![]()
![]()
![]()
![]()
![]()
| The first thing you will do in this exercise is get familiar with the Amapi 3D user-interface. To make this as easy as possible, we suggest you choose the Workshop interface (see chapter User Manual/Preferences/ Interface). | 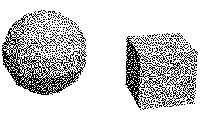 |
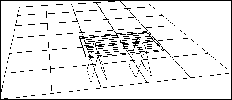
| The work space and the
interface 1. When Amapi starts up, it displays the table and the grid. They are provided to help you orient yourself in space. 2. Depending on the interface you selected (see the interface description in the chapter User Manual/Preferences/Interface/Tool palettes), there are two possibilities: · If you selected
the Workshop interface you will see the Construction Palette displayed on the right-hand
side. Move the mouse to the far right, as if you wanted the cursor to leave the screen.
You will see the Modeling Palette. Do it again: the Assembly Palette appears. Repeat this
process a few of times: the various tool palettes are displayed one after another. Return
to the Construction Palette. |
|
| Selecting a unit system Choose “centimeters” in the “Preferences/Units” menu. |
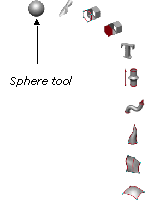
| Building a sphere 1. In the Construction Palette click on the Sphere tool icon to select it. Two axes appear; since the scene is empty, their origin is at the center of the table. If an object is already in the scene, you can set the origin yourself. 2. To facilitate object creation and modification, you can increase or decrease the step size along the axes. To do so. · Press the
“+” or “–” keys of the numeric keypad. |
|
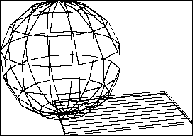
| 3. Creation of the sphere: · A first click in
the scene will define the base of your sphere. · Click on the · Press the
“-” key three or four times: you can see the sphere being modified in real time.
The number of sections defining the sphere is displayed at the bottom left corner of the
screen. |
|
| 4. Quit the Sphere tool. This can be done in two ways. We will put the tool
aside: |
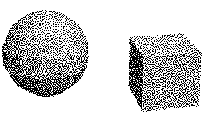
| Building a cube
1. Drag the cursor on top of the sphere icon 2. Click on the Cube tool icon to select it: 3. Again you will see the axes being displayed. This time you can set their origin using the mouse. This creates a frame of reference to help you create your cube. Click, for instance, near the bottom of the sphere. The origin of the axes is automatically set to the nearest point in the scene. |
| 4. Building the cube: · Set the center
of the base of the cube. |
You are now going to enter precise dimensions:
|
|
| Changing the viewpoint 1. You can rotate around the scene using the arrow keys of the keyboard. This will change the viewpoint accordingly. Holding down an arrow key will rotate the viewpoint continuously. 2. Let us now zoom in on the scene. · Press the
“3” key of the numeric keypad a couple of times; we are getting closer to the
object. |
| 3. You can switch planes to
change the viewpoint. This is also done through the numeric keypad: |
|
| Rendering the scene You now know how to navigate in Amapi 3D virtual space. To visualize a rendered view of your scene, press the Return key. |
|
![]() You
can move around your scene once your objects have been built. However, you can also
move around your scene while your objects are being created. Do the exercise again,
but move around the scene as you build the sphere and the cube. Try, for instance, to set
the origin of the cube on the side of the sphere.
You
can move around your scene once your objects have been built. However, you can also
move around your scene while your objects are being created. Do the exercise again,
but move around the scene as you build the sphere and the cube. Try, for instance, to set
the origin of the cube on the side of the sphere.
![]()
![]()
![]()
![]()
![]()